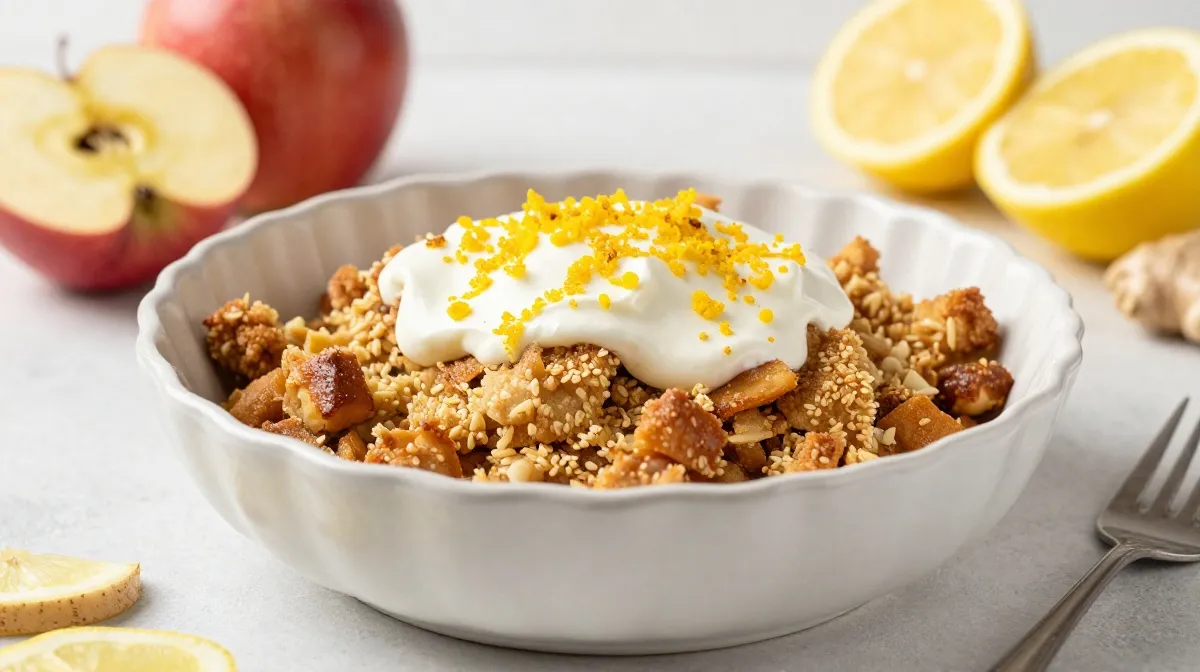
I still remember the exact moment I fell in love with apple crisp. It was a blustery October afternoon, and I’d just returned from a disastrous trip to the apple orchard where my toddler had a meltdown in the pumpkin patch and I’d forgotten my wallet. I came home exhausted, defeated, and desperately needing something that smelled like autumn rather than melted-down kid.
I had a bag of slightly bruised Honeycrisp apples sitting on my counter and a vague memory of my grandmother making something warm and crumbly when I was little. So I threw caution to the wind and started mixing flour, butter, and oats together with absolutely no idea what I was doing.
That first attempt was, to be honest, a bit of a mess. The topping was more like a dense pancake, and the apples turned into apple soup. But I ate it anyway—standing over the sink, straight from the baking dish—and something clicked. The flavor was there, hiding under my rookie mistakes. I knew I could nail this.
Fast forward a dozen or so attempts, and I’ve finally landed on my absolute favorite fall baking idea: a brown butter apple crisp with oats that’s so good, it might just make you forget about pie forever. I’ve served this at Friendsgivings, brought it to potlucks, and even made it for a first date (he’s now my husband, so take that as a recommendation). This is the recipe that made me feel like I actually knew what I was doing in the kitchen, and I want that for you too .
Why You’ll Love This Recipe
- Brown butter changes everything. It’s a simple step that adds a deep, nutty richness you just can’t get from regular melted butter. It feels fancy but takes almost no extra work .
- Perfectly textured. The oat topping gets golden and crunchy while the apples underneath turn soft and jammy. It’s the contrast that keeps me coming back for more.
- Simple ingredients, big payoff. You probably have everything you need in your pantry right now. No hunting for weird specialty items.
- It makes your house smell like a dream. This is the fall baking aesthetic in a nutshell—cinnamon, nutmeg, and brown sugar wafting through every room. It’s cozy in a baking dish.
- Beginners welcome. I messed this up multiple times and still ended up with dessert. If I can do it, so can you.
Ingredients for Brown Butter Apple Crisp
Let me walk you through what you’ll need. I’ve tested this with different ingredients over the years, so I’ve got some good substitution notes for you.
For the Apple Filling:
- 6 medium apples (about 2.5 pounds) – My secret? Use a mix. I go with 3 Granny Smith for tartness and 3 Honeycrisp for natural sweetness and juicy texture . You can also use Gala, Pink Lady, or Braeburn. Just make sure they’re firm and fresh.
- 2 tablespoons fresh lemon juice – This keeps your apples from browning and adds a bright note that balances all that sugary goodness.
- 1/3 cup granulated sugar – I don’t go overboard here because the apples themselves are sweet, and I want the fruit flavor to shine.
- 2 tablespoons all-purpose flour – A little flour thickens the juices as the apples release their liquid in the oven. No one wants a watery crisp .
- 1½ teaspoons warm spice blend – I use a mix of cinnamon, nutmeg, and a tiny pinch of cloves. Or just use 1½ teaspoons of pumpkin pie spice if you have it on hand .
- Pinch of salt – Salt makes sweet things taste sweeter. Trust me on this.
For the Brown Butter Oat Topping:
- 1 cup rolled oats – Do not use quick-cooking oats here. The old-fashioned kind give you that hearty, chewy texture that makes this topping so satisfying .
- ½ cup all-purpose flour – This is the structure of your crumble.
- ½ cup packed light brown sugar – Brown sugar adds a caramel-like depth that pairs perfectly with the browned butter.
- ½ teaspoon ground cinnamon – More cinnamon because more is always better in fall baking.
- ¼ teaspoon salt – Balances the sweetness of everything.
- ½ cup unsalted butter – This is for browning, so you want good quality unsalted butter. I’ve tried it with salted, but you lose some control over the salt level .
- Zest of 1 orange (optional but amazing) – I discovered this by accident when I had an orange sitting on the counter and thought “why not?” The citrus zest brightens everything up and adds a lovely lift .
- ½ cup chopped pecans or walnuts (optional) – I add these when I’m feeling extra, but the crisp is still wonderful without them .

Step-by-Step Instructions
Put on some cozy music, maybe pour yourself a cup of tea, and let’s do this.
Step 1: Preheat and Prep Your Dish
Preheat your oven to 350°F (175°C) . Lightly grease an 8×8 or 9×9-inch baking dish with butter or cooking spray. I’ve also made this in a 10-inch cast iron skillet, and it turns out beautifully—the edges get especially crispy .
Step 2: Brown Your Butter
This is the fun part. Put your ½ cup of unsalted butter in a light-colored saucepan over medium heat. Light-colored is important because you can actually see the butter changing color .
Let the butter melt, then keep cooking it, swirling the pan occasionally. After a few minutes, it’ll start to foam and turn golden brown. You’ll smell it too—this incredible nutty, toasty aroma. That’s the sweet spot. Remove it from the heat immediately (it can go from perfect to burnt in seconds) and stir in the orange zest if you’re using it. Let it cool for about 5 minutes while you prep your apples.
I’ve burnt my fair share of butter, so I know the panic. The trick is to watch it like a hawk once it starts turning golden. When the foam subsides and little brown specks appear at the bottom, you’re there .
Step 3: Prep the Apple Filling
Peel, core, and slice your apples. I aim for about ¼-inch thick slices—not too thin because you want them to keep some structure during baking.
In a large mixing bowl, toss the apple slices with the lemon juice. Then add the sugar, flour, spice blend, and salt. Stir until every single apple slice is evenly coated. The mixture should smell incredible at this point.
Spread the apples evenly in your prepared baking dish. Don’t overthink this—just make sure they’re relatively level so the topping goes on evenly.
Step 4: Make the Crisp Topping
In another bowl, combine the rolled oats, flour, brown sugar, cinnamon, and salt. Give it a good stir to make sure everything’s mixed together.
Pour in the warm browned butter (with the orange zest if you used it) and mix until the dry ingredients are all moistened and clumps start to form . If you’re adding nuts, fold them in now. This is the part that’s so satisfying—the mixture should look crumbly and chaotic, not like a uniform paste.
Here’s a crucial tip I learned the hard way: sprinkle the topping over the apples, don’t press it down . You want it to be light and loose so it can get crispy in the oven. Pressing it down just gives you a dense, doughy top.
Step 5: Bake Until Golden and Bubbly
Pop your crisp in the oven and bake for about 40 to 45 minutes. You’ll know it’s ready when the topping is golden brown and you can see the apple filling bubbling at the edges of the dish .
If the topping starts looking too brown before the filling is done, tent a piece of foil loosely over the top for the last 10 minutes or so.
Step 6: The Patience Challenge
Let the crisp cool for at least 10 to 15 minutes before you serve it. I know, I know—it smells amazing and you want it now. But trust me, this step is crucial. The juices need time to thicken, or you’ll end up with runny apple soup on your plate. I’ve learned this lesson the hard way multiple times. Wait the 15 minutes. It’s worth it .

Pro Tips & Tricks
Here’s everything I wish someone had told me before I started making apple crisp.
- Mix your apples. Using a combination of tart and sweet apples gives you a much more complex, balanced flavor . I’ve tried it with all Granny Smith and it was a bit too sour. All Honeycrisp was lovely but a little one-note. The mix is where the magic happens.
- Don’t overmix the topping. The goal is crumbly, clumpy, and a little chaotic. Overmix, and you’ll end up with a dense paste that doesn’t crisp up . Mix just until everything is moistened and clumps form, then stop.
- Line a baking sheet. I always place my baking dish on a rimmed baking sheet lined with foil before putting it in the oven . Apple crisp has a habit of bubbling over, and this saves you from a burnt, sticky mess on the bottom of your oven.
- Toast your oats and nuts first. If you really want to level up, toast the oats and nuts in a dry skillet for 3-5 minutes before mixing them into the topping. It adds extra crunch and brings out their natural flavors . I discovered this when I was making a granola recipe and thought “why not apply this to my crisp?”
- Serve it warm, not hot. Let it rest. The juices thicken, the flavors meld, and it’s at the perfect temperature for a scoop of ice cream. If the ice cream melts instantly into a puddle, your crisp is too hot.
Variations & Substitutions
This recipe is so flexible. Here are some of my favorite ways to mix it up.
- Pear and Apple Crisp: Swap half the apples for ripe but firm pears. The pears are softer and sweeter, which creates a lovely contrast with the tart apples . I first tried this when I accidentally bought a bag of pears thinking they were apples (don’t ask), and it was a happy accident.
- Maple Syrup Swap: Use maple syrup instead of half the brown sugar in the topping, or drizzle it over the apples before adding the topping. It adds a lovely warm, woodsy sweetness that’s perfect for fall .
- Make it Gluten-Free: This is surprisingly easy. Use a 1:1 gluten-free baking flour blend in both the filling and the topping, and make sure you’re using certified gluten-free rolled oats . I’ve made this for friends with celiac disease, and they couldn’t tell the difference.
- Add Cranberries: For a pop of tartness and color, toss a half-cup of fresh or frozen cranberries into the apple mixture before baking. It’s gorgeous and adds a festive touch.
- Go Nut-Free: If you or someone you’re serving has a nut allergy, just leave them out. The topping is still wonderfully crisp and delicious without them .
Serving Suggestions
This crisp is amazing all on its own, but if you want to take it to the next level, here’s what I recommend.
- Vanilla Ice Cream: The classic for a reason. The cold creaminess against the warm, spiced apples is pure perfection. I’m a fan of a really good-quality vanilla bean ice cream. It’s worth the splurge.
- Whipped Cream: If ice cream feels like too much, homemade whipped cream is a lovely alternative. Add a pinch of cinnamon while you’re whipping it for extra fall vibes.
- Caramel Drizzle: This is the extra step that turns a great dessert into a spectacular one. Warm up some good-quality caramel sauce and drizzle it over the top . A sprinkle of flaky sea salt over the caramel is a game-changer.
- Coffee or Chai: This crisp was literally made to be eaten alongside a warm drink. Serve it with a cup of strong coffee in the afternoon, or with a mug of chai tea after dinner. It’s a cozy moment in dessert form.
- Brunch: Who says crisp is only for dessert? I’ve served this at weekend brunch with yogurt and a drizzle of maple syrup, and it was a huge hit .
FAQ’s
Can I make this apple crisp ahead of time?
You absolutely can. Assemble the entire crisp (filling and topping) in the baking dish, cover it tightly with foil, and store it in the fridge for up to 24 hours. When you’re ready to bake, add about 5-10 minutes to the baking time since it’s starting from a cold state. The topping might lose a little crispness, but it’ll still be delicious.
Can I freeze apple crisp?
Yes, two ways. You can freeze the unbaked crisp for up to three months. Assemble it, wrap it well in foil and plastic wrap, and freeze. When you’re ready to bake, pop it in the oven from frozen, but it’ll need extra time. Or, bake it completely, cool it, and freeze it in portions. Reheat in the oven for best results.
What’s the best way to reheat leftovers?
The oven is best for keeping that topping crisp. Reheat at 350°F for about 10-15 minutes. The microwave will work in a pinch, but you’ll lose some of that lovely crunch. Honestly, I’ve eaten this cold straight from the fridge and it’s still pretty good.
Why is my topping soggy?
This usually happens for one of three reasons: you used quick oats instead of old-fashioned, you didn’t bake it long enough, or you didn’t let it rest. The juices thicken as it cools, so giving it that 15-minute rest is crucial. Also, make sure your butter is melted before adding it to the topping mixture.
Can I use a different fruit?
Absolutely. This recipe works beautifully with pears, peaches, or even a mix of berries. You might need to adjust the sugar based on the sweetness of your fruit and the bake time based on the texture. Pears and peaches generally bake about the same as apples, but berries will need less time.
Do I have to peel the apples?
I always peel them because I prefer the texture of the tender apple flesh without the chewy skins. But if you don’t mind the texture, you can leave the skins on. Just make sure you wash them well. The skins also add a nice red color to the filling.
Related Recipes
- 8 Whiskey Cocktails for Cozy Autumn Nights
- Fall Baking: Cozy Recipe for Autumn
- 7 Hot Fall Cocktails to Keep You Cozy
-
Final Thoughts
There’s something about fall baking that just makes everything feel a little bit better. The changing leaves, the cooler air, the way the kitchen gets all warm and cozy when the oven’s on—it’s my favorite season for a reason.
This brown butter apple crisp has been my companion through so many autumn moments. It’s been the last-minute dessert I threw together for unexpected guests, the comforting treat I made after a long week, and the dish I’ve brought to share with people I love. Every time I make it, I think of that first disaster attempt and smile at how far I’ve come.
So go ahead—grab those apples, brown that butter, and fill your kitchen with the smell of cinnamon and nutmeg. Let the oven warm up your house and your heart. And when you pull that golden, bubbling crisp out of the oven, be proud of yourself. You made something beautiful and delicious from simple ingredients. That’s the whole magic of cooking, isn’t it?
I can’t wait to hear how yours turns out. Leave a comment below, tag me in your photos, and tell me all about it. Happy baking, friends. May your fall be filled with warm treats and good company.