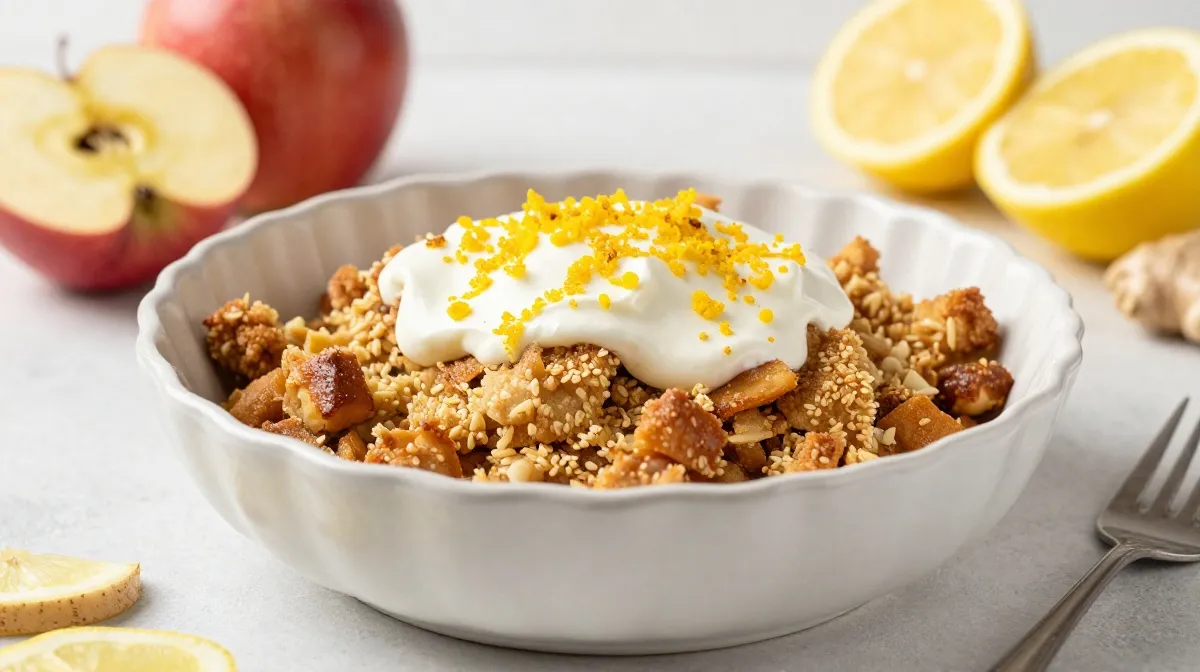
I’ll never forget the first time I made apple crisp that actually worked. It was a chilly October evening, my kitchen windows were fogged up from boiling pasta, and I had three sad-looking apples sitting on the counter that were definitely past their prime for snacking. I’d attempted crisps before — dry, sad affairs with topping that either burned or stayed raw and floury. My family ate them out of politeness, and I felt defeated.
That night, I decided to stop following recipes that sounded fancy and started trusting my instincts. I browned the butter until it smelled like hazelnuts. I tossed the apples in a little lemon juice and didn’t skimp on the cinnamon. And for the first time, I let the crisp bubble until I saw the juices caramelizing around the edges of the pan.
When I pulled it out of the oven, the kitchen smelled like everything good about autumn — cinnamon, nutmeg, caramelized sugar, and warmth. We ate it straight from the dish with melting vanilla ice cream, and nobody said a word for about five minutes. We just kept scooping.
That’s the magic of a great apple crisp. It doesn’t ask for fancy techniques or hard-to-find ingredients. It just asks for good apples, patience, and a little bit of butter love. And after making this recipe at least two dozen times over the years, I’ve finally figured out how to get it perfect every single time. Let me show you how.
Why You’ll Love This Apple Crisp
- It’s ridiculously forgiving. Overmix the topping? It’s fine. Use the “wrong” apples? Still delicious. This recipe bends with whatever you have on hand.
- One bowl, minimal cleanup. You don’t need a stand mixer, multiple saucepans, or special skills. Just a bowl, a baking dish, and your hands.
- Pantry-friendly ingredients. If you keep flour, oats, butter, sugar, and spices in your kitchen, you’re already 90% of the way there.
- That perfect crispy-to-juicy ratio. Too many crisps have skimpy toppings or soupy filling. This one gets it right — a generous, buttery crumble on top of tender, perfectly spiced apples that hold their shape.
- The smell alone is worth it. Your entire house will smell like a cozy fall candle, but better, because it’s real.
Ingredients for the Perfect Apple Crisp
For the Apple Filling
- 6 medium apples (about 2½ pounds), peeled, cored, and sliced about ¼-inch thick. I like a mix of Honeycrisp and Granny Smith — sweet meets tart .
- ½ cup brown sugar, packed (light or dark works — dark gives more caramel flavor)
- 1 tablespoon fresh lemon juice (this brightens the apples and keeps them from browning)
- 2 tablespoons all-purpose flour (helps thicken those beautiful juices)
- 1½ teaspoons ground cinnamon
- ¼ teaspoon ground nutmeg (freshly grated if you have it — the difference is real)
- Pinch of kosher salt
For the Crisp Topping
- 1 cup old-fashioned rolled oats (not quick-cooking — you want that texture)
- ¾ cup all-purpose flour
- ½ cup brown sugar, packed
- ½ cup granulated sugar
- ½ teaspoon ground cinnamon
- ¼ teaspoon kosher salt
- ½ cup unsalted butter, cold and cut into small cubes
- ½ cup chopped pecans or walnuts (optional, but I love the crunch they bring)
For Serving (Highly Recommended)
- Vanilla ice cream or lightly sweetened whipped cream
Ingredient Swaps
- Oats: If you’re out of rolled oats, you can use quick-cooking oats in a pinch, but the texture will be less chewy. For a completely oat-free topping, skip them and increase the flour to 1¼ cups .
- Butter: Unsalted is best so you control the salt, but salted butter works too — just reduce the added salt to a pinch.
- Apples: Any firm baking apple will do. Golden Delicious, Pink Lady, Fuji, or Jonagold are all great. Avoid Red Delicious — they turn to mush .
- Nut-Free: Simply omit the nuts; the topping stays wonderfully crisp on its own.

Step-by-Step Instructions
1. Preheat the Oven and Prep the Dish
Preheat your oven to 350°F. Grab a 9×9-inch baking dish (or something similar in size — an 8×11 or a deep pie dish works too) and lightly grease it with butter or cooking spray. Set it aside.
2. Prepare the Apple Filling
In a large mixing bowl, toss your sliced apples with the brown sugar, lemon juice, flour, cinnamon, nutmeg, and salt. Use your hands or a big spoon to coat every slice evenly. The apples should look glossy and smell incredibly fragrant. Transfer the mixture to your greased baking dish, spreading it into an even layer.
3. Make the Crisp Topping
In another bowl, combine the oats, flour, both sugars, cinnamon, and salt. Whisk everything together so the dry ingredients are evenly distributed. Add the cold butter cubes and use your fingers or a pastry cutter to work the butter into the dry mixture. You’re looking for a crumbly texture — some pea-sized butter bits, some smaller — and the mixture should hold together slightly when you squeeze it. If you’re using nuts, fold them in now.
4. Assemble and Bake
Sprinkle the topping evenly over the apples. Don’t pack it down — just let it fall naturally in a nice, even blanket. Place the dish on a baking sheet to catch any drips (trust me on this — it will bubble over). Bake uncovered for 45 to 50 minutes, or until the topping is deep golden brown and you can see the apple juices bubbling up around the edges of the pan .
5. Rest and Serve
Here’s the part a lot of people skip: let the crisp rest for at least 10 to 15 minutes before serving. This lets the filling thicken up so it’s not runny. Scoop it into bowls while it’s still warm, top with a generous scoop of vanilla ice cream, and watch it melt into all those caramelized edges. Pure heaven.

Pro Tips & Tricks
- Don’t Overmix the Topping. When you’re cutting in the butter, stop when the mixture looks like coarse sand with some larger clumps. Overworking it will make the topping dense instead of light and crumbly. Cold butter is your friend here.
- Brown the Butter for Next-Level Flavor. This is my secret weapon. If you have an extra 5 minutes, melt your butter in a light-colored saucepan over medium heat until it turns golden and smells nutty — about 3 to 5 minutes. Let it cool slightly, then mix it into the topping ingredients. It adds a depth of flavor that makes people ask, “What did you put in this?”
- Slice Apples Evenly. If you have thick and thin slices in the same dish, the thin ones will turn to mush while the thick ones are still firm. Aim for ¼-inch slices — a mandoline makes quick work of this, but a sharp knife and a steady hand work just fine.
- Let It Rest Before Serving. I know it’s hard. The smell is intoxicating and everyone’s waiting with spoons. But those 10 to 15 minutes are crucial for the juices to settle and thicken. If you cut into it immediately, you’ll have apple soup with crumble on top .
- Toast the Oats (Optional). For an extra-crispy topping, toast your oats in a dry skillet over medium heat for 3 to 4 minutes before mixing them into the topping. They’ll smell nutty and stay crunchy even after baking.
Variations & Substitutions
Gluten-Free Apple Crisp
This one’s easy — just swap the all-purpose flour for a 1:1 gluten-free baking flour and make sure your oats are certified gluten-free. The texture will be slightly more delicate, but the flavor is spot-on. I’ve tested this with Bob’s Red Mill and King Arthur blends, and both worked beautifully.
Pear and Apple Crisp
For a softer, more delicate filling, replace half the apples with firm pears (Bosc or Anjou are great). The pear melts into the apples and adds a subtle sweetness that’s absolutely lovely .
Maple Bourbon Apple Crisp
Add 2 tablespoons of bourbon to the apple mixture and swap half the brown sugar for maple syrup. The bourbon adds warmth and complexity — just be sure to taste as you go. This version is especially good for holiday gatherings.
Dairy-Free Version
Use coconut oil or a plant-based butter substitute (Miyoko’s and Country Crock Plant Butter work well) in place of dairy butter. The topping will still get crispy, though the flavor will be slightly different — still delicious, just a little less rich.
Serving Suggestions
Apple crisp is practically a whole meal when you pair it with the right things. Here’s how I like to serve it:
- The Classic: Warm crisp with a big scoop of vanilla bean ice cream melting into the topping. This is how 90% of the world eats it, and for good reason.
- Whipped Cream + Caramel Drizzle: Top with lightly sweetened whipped cream and a drizzle of caramel sauce. A pinch of flaky sea salt takes it over the top .
- Breakfast Apple Crisp: If there are leftovers (big “if”), reheat a scoop in the morning and top it with Greek yogurt instead of ice cream. It’s like having dessert for breakfast, and I fully support that life choice.
- Holiday Table: Serve it alongside roasted turkey or glazed ham for a comforting Thanksgiving dessert. It’s less fussy than pie and always gets polished off first.
FAQ’s
Can I make apple crisp ahead of time?
Absolutely. You can assemble the entire crisp (without baking) up to 24 hours in advance. Just cover and refrigerate, then add an extra 10 to 15 minutes to the baking time since you’re starting from cold. You can also bake it fully and reheat it later — the topping won’t be as crispy, but it will still be delicious.
How do I store leftover apple crisp?
Cover the dish with foil or transfer leftovers to an airtight container and refrigerate for up to 4 days . The topping will soften as it sits, but it’s still tasty.
Can I freeze apple crisp?
Yes! You can freeze it unbaked or baked. To freeze unbaked, assemble the crisp, wrap it tightly with plastic wrap and foil, and freeze for up to 3 months. Bake from frozen, adding about 15 minutes to the cooking time. For baked crisp, let it cool completely, wrap well, and freeze. Thaw in the fridge overnight and reheat in the oven.
What’s the best way to reheat apple crisp?
For the crispiest topping, reheat in a 350°F oven for 10 to 15 minutes until warmed through. The microwave works in a pinch, but the topping will be soft, not crispy. I always do the oven if I have time .
Why is my apple crisp watery?
This usually happens when you use apples that are too juicy or don’t let it rest before serving. Some apples release more liquid than others. Make sure you’re using firm baking apples, and always include the flour in the filling — it thickens the juices as they bake. And remember, the rest time after baking is essential .
Can I use frozen apples?
You can, but you’ll need to adjust. Thaw them first and drain off the excess liquid — frozen apples release a lot of water when they thaw. You might also need to add an extra tablespoon of flour to the filling to help compensate for the additional moisture.
Related Recipes:
- 7 Hot Fall Cocktails to Keep You Cozy
- 8 Whiskey Cocktails for Cozy Autumn Nights
- 8 Apple Strudel Recipes That Taste Homemade
- 8 Apple Cider Cocktails Perfect for Chilly Nights
A Few Final Thoughts
This apple crisp has become my fall signature. It’s the dessert I bring to potlucks, the one my kids request when the leaves start changing, and the one I make just for myself on quiet Sunday afternoons. It doesn’t need a fancy name or complicated technique. It just needs good apples, warm spices, and the kind of butter-heavy topping that makes everything feel okay.
I hope this recipe finds its way into your kitchen and becomes part of your fall traditions too. Make it your own — try the bourbon version, skip the nuts, add a little cardamom if you’re feeling adventurous. And when you take that first bite and the crisp topping crunches against the tender, spiced apples, I hope you feel the same warmth I do.
If you make it, tag me in your photos or leave a comment below — I genuinely love seeing what people create in their own kitchens. Happy baking, friend.