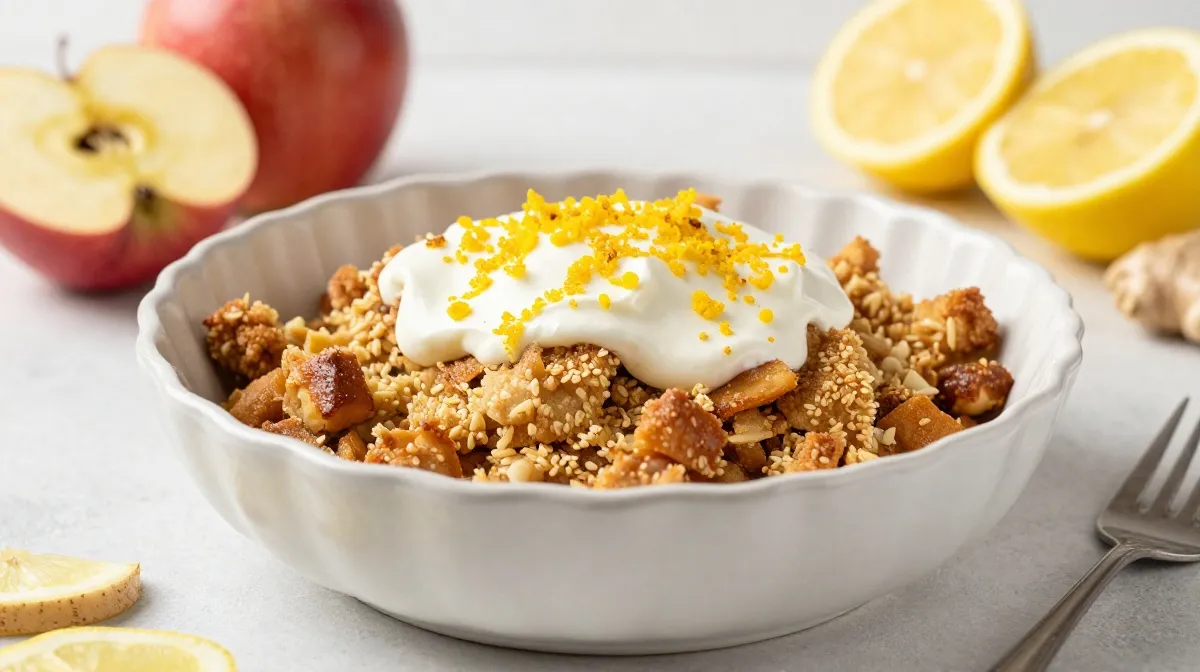
I’ll never forget the first time I tried to make a proper apple crisp. It was a rainy October afternoon, and I was desperately craving something that smelled like autumn. I’d just moved into my first apartment, and the grocery store had bags of gorgeous Honeycrisp apples on sale. I figured, how hard could it be?
Well, my first attempt was a soggy disaster. The topping was more like sad, clumpy paste than a crispy crumble, and the apples had turned into applesauce. I ate it anyway, standing over the sink, because even a failed baking attempt is still pretty good when you’re in the mood for fall flavors.
But over the years, I’ve made this apple crisp with oatmeal dozens of times. I’ve experimented with different apples (Granny Smith vs. Honeycrisp vs. a mix of both), tried different oat-to-flour ratios, and even burned the topping so badly once that I had to scrape off the top layer with a butter knife. The result? I’ve finally landed on a recipe that’s pure gold—or rather, pure golden-brown, buttery, cinnamon-spiced perfection. This is the fall baking idea that gets me through sweater weather, and I’m so excited to share it with you .
Why This Apple Crisp Recipe Will Be Your New Favorite
Before we get into the nitty-gritty of slicing apples and mixing oats, let me tell you why this recipe deserves a spot in your fall baking rotation.
- It uses simple pantry staples. You probably already have most of the ingredients in your kitchen—flour, oats, butter, brown sugar, cinnamon. No fancy equipment or hard-to-find items required.
- It’s practically foolproof. Unlike pies that require a delicate crust, this crisp is forgiving. Overmix the topping? It’s fine. Slice your apples a little unevenly? Also fine. The oven does the heavy lifting here.
- The aroma is intoxicating. Honestly, half the reason I make this is for the smell that fills my house. Cinnamon, nutmeg, and baked apples? It’s like a candle company tried to bottle the essence of fall.
- It’s the ultimate crowd-pleaser. I’ve brought this to potlucks, Thanksgiving dinners, and casual weeknight hangouts, and it always disappears quickly. Serve it warm with vanilla ice cream, and you’ll be everyone’s favorite person.
Ingredients for the Ultimate Apple Crisp
Alright, let’s gather our ingredients. I like to prep everything before I start baking, so I’m not frantically searching for the cinnamon halfway through.
For the Apple Filling:
- 6 medium apples (about 2.5 pounds) – My personal favorite is a mix of Granny Smith and Honeycrisp. The Granny Smiths give it that nice tart bite, while the Honeycrisps bring a lot of natural sweetness and juicy texture . You can also use Gala, Pink Lady, or Braeburn if that’s what you have.
- 1 tablespoon fresh lemon juice – This helps keep the apples from browning and adds a nice, bright note that balances the sweetness.
- 2 tablespoons all-purpose flour – A little bit of flour thickens the juices as the apples release their liquid, so you don’t end up with a watery mess .
- 1/2 teaspoon ground cinnamon – The star of the show for any fall baking idea.
- 1/4 teaspoon ground nutmeg – Nutmeg adds warmth and depth. If you have a whole nutmeg, grate it fresh—the flavor is incredible.
- 1/4 cup granulated sugar – I don’t go overboard here because the apples themselves are sweet. You can adjust this amount depending on how tart your apples are.
For the Oat Crisp Topping:
- 3/4 cup rolled oats – Not the quick-cooking kind, please! Rolled oats give the topping that wonderful, hearty texture .
- 1/2 cup all-purpose flour – Flour is the backbone of the crumble.
- 1/2 cup packed light brown sugar – Brown sugar adds a deep, caramel-like flavor and helps the topping get that beautiful golden color.
- 1/2 teaspoon ground cinnamon – More cinnamon! Because you can never have too much.
- 1/4 teaspoon salt – A pinch of salt in a sweet recipe is a must. It enhances the flavors and balances the sweetness.
- 1/2 cup unsalted butter, melted – I’ve learned the hard way that cold butter doesn’t work well for this type of crisp topping. Melted butter binds everything together and creates a more cohesive, clumpy, and crispy topping .
Optional Add-Ins:
- 1/2 cup chopped pecans or walnuts – If you love a little crunch, fold these into your topping. I’ve done it with both, and they both taste amazing .

Step-by-Step Instructions for Perfect Fall Baking
Let’s get our hands a little messy. Here’s how I make this warm, comforting dessert.
Step 1: Preheat and Prep
First things first, preheat your oven to 350°F (175°C). Lightly grease an 8×8 or 9×9-inch baking dish with butter or cooking spray . I use an 8×8 ceramic dish, and it works perfectly.
Step 2: Make the Apple Filling
Peel, core, and slice your apples. I like to slice them about 1/4-inch thick—not paper-thin, because you want them to hold their shape a little as they bake. In a large bowl, toss the apple slices with lemon juice, then add the flour, cinnamon, nutmeg, and granulated sugar. Stir until all the apple slices are evenly coated. The mixture should smell incredible by this point, I promise. Pour the apple mixture into your greased baking dish and spread it out evenly.
Step 3: Make the Oat Topping
In a separate bowl, combine the rolled oats, flour, brown sugar, cinnamon, and salt. Stir to combine. Then, pour in the melted butter and stir until everything is thoroughly moistened and the mixture forms clumpy, crumbly pebbles. If you’re using nuts, toss them in now. One mistake I used to make was pressing the topping down onto the apples. Don’t do that! Sprinkle it evenly over the apples without pressing down . You want the topping to be light and loose so it can crisp up in the oven.
Step 4: Bake to Golden Perfection
Place the dish in the preheated oven and bake for about 40 to 45 minutes. You’ll know it’s ready when the topping is golden brown and the filling is bubbly and thick-looking around the edges . If the topping starts to get too brown before the apples are tender, you can loosely cover it with a piece of aluminum foil for the last 10 minutes or so.
Step 5: Cool (The Most Important Part!)
This is the step I always rush, and I’m always reminded why I shouldn’t. Let the crisp cool for at least 10 to 15 minutes before serving . This gives the juices a chance to thicken up so they don’t run all over the plate when you scoop it out. Trust me on this one—patience is key.
My Best Pro Tips for This Fall Baking Idea
These little nuggets of wisdom are the result of many trial-and-error batches. I hope they help you skip the mistakes I made!
- Don’t Overmix the Topping: The goal is to have a crumbly, clumpy texture. If you mix it too much, the butter will fully incorporate into the flour, and you’ll end up with a more dense, uniform paste rather than a crisp, crumbly topping. Mix just until the butter is distributed and clumps form .
- Use a Mix of Apple Varieties: For the best flavor, don’t just use one type of apple. A mix of tart (like Granny Smith) and sweet (like Honeycrisp or Gala) gives the filling a more complex, balanced flavor profile . I’ve tried it with just one variety, and it’s good, but the mix is definitely better.
- The “Earlobe” Test for Oats? Just kidding! But seriously, you want to make sure your rolled oats are nice and fresh. Old, stale oats can make the topping taste a bit cardboard-y. Give them a sniff before you use them.
- Serve Warm, Not Hot: I know it’s tempting to dig in the second it comes out of the oven, but letting it sit for 15 minutes is a game-changer. The flavors meld together, the topping sets, and it’s the perfect temperature to top with a scoop of ice cream that doesn’t instantly melt into a puddle.
- Line a Baking Sheet: I always place my baking dish on a foil-lined baking sheet before putting it in the oven. Apple crisps have a tendency to bubble over, and this saves you from a sticky, burnt mess on the bottom of your oven

Fun Variations to Try
This recipe is a canvas for your creativity. Here are a few of my favorite ways to switch it up.
- The Maple Pecan Swap: Instead of brown sugar in the topping, use 1/3 cup of pure maple syrup and fold in 1/2 cup of toasted pecans. It gives the whole thing a cozy, sophisticated fall flavor .
- Add Some Tartness: If you’re a fan of contrasting flavors, toss a half-cup of fresh or frozen cranberries into the apple mixture before baking. It adds a lovely pop of tartness and a beautiful color . I first did this for a Thanksgiving side dish, and it was a huge hit.
- Make It Gluten-Free: It’s super easy to make this recipe gluten-free. Just use a gluten-free all-purpose flour blend (1:1 ratio) in both the filling and the topping, and make sure you’re using certified gluten-free rolled oats . I’ve made it for friends with celiac disease, and they couldn’t tell the difference.
What to Serve with This Apple Crisp
This dessert is amazing all on its own, but if you want to take it to the next level, here are my favorite pairings.
- Vanilla Ice Cream: This is the classic for a reason. The cold, creamy ice cream against the warm, spiced crisp is a perfect match. I’m a fan of a really good-quality vanilla bean ice cream.
- Whipped Cream: If you don’t have ice cream, homemade or even store-bought whipped cream is a great alternative. Add a tiny pinch of cinnamon to the cream for extra flair.
- Caramel Sauce: For the ultimate indulgence, warm up some store-bought caramel sauce or make your own and drizzle it over the top of the crisp and ice cream. It’s over-the-top in the best way possible.
- A Cup of Coffee or Hot Tea: Let’s be honest, this crisp is the perfect companion to a warm drink. Enjoy a slice with a cup of coffee in the afternoon, or with a mug of chai tea after dinner for a truly cozy evening.
I get a lot of questions about this recipe. Here are the most common ones.
FAQ’s
Can I prepare this apple crisp ahead of time?
Yes! You can assemble the entire crisp (filling and topping) in the baking dish, cover it tightly, and store it in the refrigerator for up to 24 hours before baking . You might need to add 5-10 minutes to the baking time since it’s starting from a cold state.
Can I freeze apple crisp?
Yes, you have two options. You can freeze it unbaked for up to three months. Assemble, wrap well in foil and plastic wrap, and freeze. When you’re ready to bake, bake it from frozen, but it will need extra time in the oven. Alternatively, you can bake it, let it cool completely, and freeze it. Reheat individual portions in the microwave or the oven .
What’s the best way to reheat this fall baking idea?
To keep the topping crisp, reheat it in the oven at 350°F for about 10-15 minutes. For a quick fix, the microwave works, but you’ll lose some of the crispness in the topping.
Why is my topping soggy?
A soggy topping can happen for a few reasons. You might not have baked it long enough for the moisture to evaporate, or you might have used quick oats instead of old-fashioned rolled oats, which don’t have the same hearty texture. Also, be sure to let the crisp cool! The juices thicken as it cools.
Can I make this dessert in a cast iron skillet?
Absolutely! This is one of my favorite ways to make it. A 10-inch cast iron skillet is perfect for this recipe. It gives the edges a nice, caramelized, crisp texture . Just make sure to grease the skillet well.
What if I don’t have brown sugar?
You can make your own brown sugar at home by combining 1 cup of granulated sugar with 1 to 2 tablespoons of molasses (adjust for light or dark brown sugar) and mixing it until it’s well combined. For this recipe, you can also just use granulated sugar, but the topping won’t have quite the same caramel-y depth of flavor.
Related Recipes
- Halloween Rice Krispie Treats | Easy Recipe
- Easy Halloween Treat for Kids | Fun Ideas
- 7 Hot Fall Cocktails to Keep You Cozy
-
My Final Thoughts on This Cozy Fall Dessert
I hope you love this apple crisp with oatmeal as much as I do. It’s become more than just a dessert in my kitchen—it’s a tradition. The smell of cinnamon and nutmeg wafting from the oven, the sound of it bubbling away, and the way it brings everyone to the table with a smile—that’s the magic of a good fall baking idea.
So, go ahead, pick up a bag (or two) of your favorite apples, and give this recipe a try. Enjoy the process, don’t stress about perfection, and be sure to save yourself a scoop before it all disappears. I can’t wait to hear how it turns out for you. Let me know in the comments!