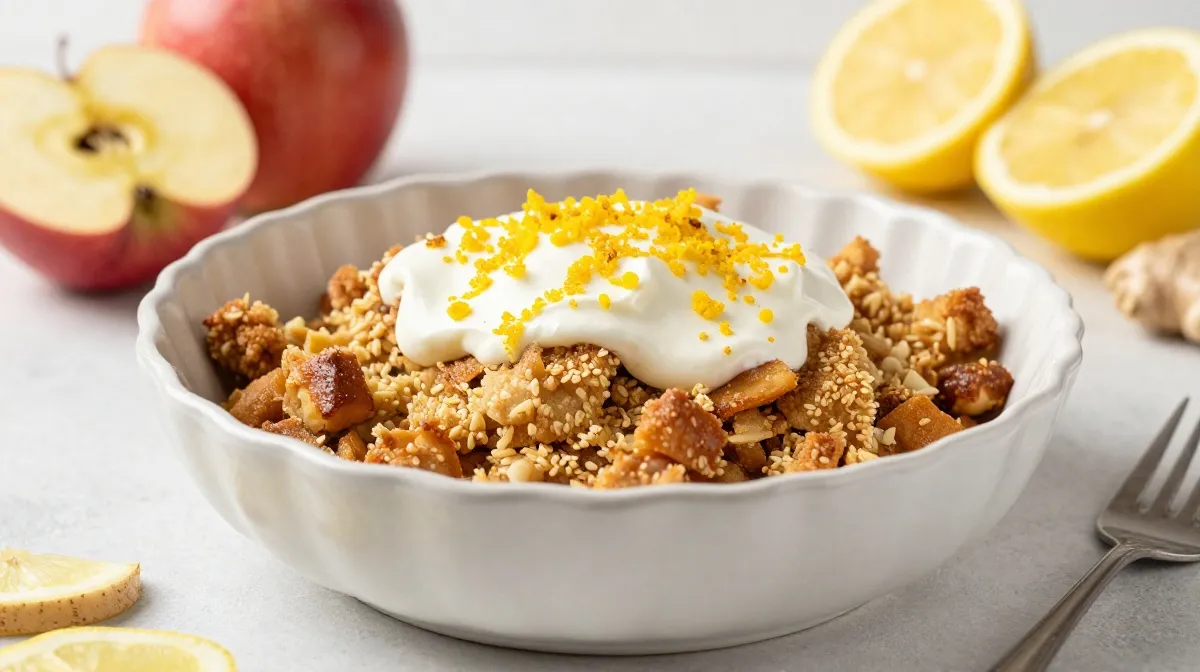
I still remember the first time I pulled this skillet apple crisp out of the oven. The house smelled like cinnamon heaven, my kids were hovering like little vultures, and when I took that first bite—warm, tender apples giving way to the buttery, crunchy topping—I knew I had a keeper.
I’ve made this skillet apple crisp more times than I can count, especially during apple season when my kitchen counter looks like an orchard exploded. What started as a quick way to use up a bag of apples from the farmers market has become my go-to dessert when I want something comforting without spending all day in the kitchen. Baking it straight in the cast iron pan gives it the most incredible caramelized edges and keeps everything perfectly warm for seconds (and thirds).
Trust me, once you try this version, you won’t go back to baking it in a regular casserole dish. The cast iron holds heat like a dream and gives the bottom layer of apples this subtle depth that just sings with the spices.
Why You’ll Love This Recipe
- Dead simple but tastes fancy: No fancy techniques here—just chop, mix, and bake. It looks like you spent hours but comes together in about 15 minutes of hands-on time.
- One-pan wonder: Everything happens in your cast iron skillet. Fewer dishes mean more time to enjoy dessert.
- Crowd-pleaser every single time: I’ve served this to picky kids, fancy dinner guests, and everyone in between. It disappears fast.
- Budget-friendly and flexible: Uses basic pantry staples and whatever apples you have on hand. Perfect for using up fruit that’s past its prime.
- That cast iron magic: The skillet gives you crispy edges and even baking you just don’t get in glass or ceramic. Plus it stays warm longer at the table.
This isn’t just another apple dessert. It’s the one people ask me for the recipe every single fall.

Ingredients
For the Apple Filling:
- 6-7 medium apples (I love a mix of Granny Smith for tartness and Honeycrisp or Gala for sweetness), peeled, cored, and sliced about ¼-inch thick
- ½ cup granulated sugar
- ¼ cup packed brown sugar
- 2 tablespoons fresh lemon juice (about 1 lemon)
- 2 teaspoons ground cinnamon
- ½ teaspoon ground nutmeg (freshly grated if you can)
- ¼ teaspoon ground cardamom (optional but so good)
- 1 teaspoon vanilla extract
- 2 tablespoons all-purpose flour (or cornstarch for gluten-free)
- Pinch of salt
For the Crisp Topping:
- 1 cup old-fashioned rolled oats (not quick oats)
- ¾ cup all-purpose flour
- ½ cup packed brown sugar
- ½ cup granulated sugar
- 1 teaspoon ground cinnamon
- ¼ teaspoon salt
- ¾ cup (1½ sticks) cold unsalted butter, cut into small cubes
- ½ cup chopped pecans or walnuts (optional but highly recommended for extra crunch)
Optional Add-ins:
- A handful of raisins or dried cranberries
- 1-2 tablespoons bourbon or apple brandy for a grown-up twist
I always use a mix of apples because that’s what gives the best texture and flavor balance. The tart ones hold their shape while the sweet ones melt into jammy goodness.

Step-by-Step Instructions
Preheat your oven to 375°F (190°C). Make sure your 10- or 12-inch cast iron skillet is seasoned and ready.
Step 1:
Prepare the apples. Peel, core, and slice them evenly. I like to aim for slices that are similar in thickness so they cook at the same rate. Toss them immediately with the lemon juice in a big bowl to prevent browning. Then add both sugars, cinnamon, nutmeg, cardamom, vanilla, flour, and salt. Give everything a good stir until the apples are evenly coated. Let this sit for about 10 minutes while you make the topping—the juices will start to release and that’s exactly what you want.

Step 2:
Make the crisp topping. In another bowl, combine the oats, flour, both sugars, cinnamon, and salt. Add the cold butter cubes. Now, the fun part—use your fingers or a pastry cutter to work the butter into the dry ingredients. You want a crumbly mixture with some pea-sized butter pieces still visible. This is what gives you those perfect crunchy clusters. Stir in the chopped nuts if using.
I’ve learned over the years that keeping the butter cold is key. If it gets too soft, pop the bowl in the fridge for 10 minutes.
Step 3:
Assemble in the skillet. No need to grease the cast iron if it’s well-seasoned—the butter in the topping will take care of things. Pour the apple mixture straight into the skillet, scraping out all those delicious juices. Spread the apples evenly, then sprinkle the topping generously over the top. Don’t press it down too much—let it stay loose for maximum crispiness.

Step 4:
Bake. Place the skillet on a baking sheet (to catch any bubbling over) and bake for 35-45 minutes. You’ll know it’s done when the topping is deep golden brown, the apples are bubbling around the edges, and your kitchen smells incredible. If the topping browns too quickly, tent it loosely with foil for the last 10 minutes.
Let it cool for at least 15-20 minutes before serving. This is the hardest part, but it helps the juices set up a bit.
Pro Tips & Tricks
After making this skillet apple crisp dozens of times, here are the things I wish someone had told me earlier:
- Don’t skimp on the apples: Use at least 6 good-sized ones. Too few and you’ll end up with mostly topping.
- Cast iron temperature matters: If your skillet is cold, the bottom might not caramelize as nicely. I sometimes warm it on the stovetop for a few minutes before adding the apples.
- Make it ahead: Assemble everything up to the topping, cover tightly, and refrigerate for up to 24 hours. Add 5-10 extra minutes to the bake time if baking straight from the fridge.
- Storage: Leftovers keep beautifully covered in the fridge for 3-4 days. The topping stays surprisingly crisp.
- Reheating: Warm individual portions in the microwave with a damp paper towel over it, or pop the whole skillet back in a 350°F oven for 10-15 minutes.
One happy accident I discovered: adding a tiny pinch of salt to the apples really makes all the flavors pop.

Variations & Substitutions
This recipe is super forgiving. Here are some of my favorite ways to switch it up:
Gluten-Free Version: Swap the all-purpose flour for a good 1:1 gluten-free blend and make sure your oats are certified gluten-free. It turns out just as delicious.
Vegan Twist: Use cold vegan butter or coconut oil (solid form) in the topping. The coconut oil gives a lovely subtle flavor that pairs beautifully with apples.
Bourbon Apple Crisp: Add 2 tablespoons of bourbon to the apple mixture. It adds this warm depth that makes it feel extra special for holiday gatherings.
I’ve also done a ginger-lemon version with extra fresh ginger and lemon zest that brightens everything up beautifully in early fall.

Serving Suggestions
This skillet apple crisp is perfect straight from the pan, still warm, with a big scoop of vanilla ice cream melting over the top. The contrast of hot and cold is unbeatable.
For something even more indulgent, try it with whipped cream spiked with a little cinnamon or a drizzle of caramel sauce. At brunch, I serve smaller portions alongside strong coffee. It also works wonderfully for potlucks or Thanksgiving—transport the whole skillet and reheat on site.
Pair it with sharp cheddar cheese slices for that classic apple-cheese combo that never fails.
FAQ’s
Can I make this skillet apple crisp ahead of time?
Absolutely. Assemble it completely, cover, and refrigerate up to a day ahead. Bake when you’re ready, adding a few extra minutes.
How do I store leftovers?
Cover the skillet tightly with foil or transfer to an airtight container and refrigerate for up to 4 days. The topping holds up surprisingly well.
Can I freeze it?
Yes! Bake first, cool completely, then wrap tightly and freeze for up to 3 months. Thaw overnight in the fridge and reheat in the oven.
What if I don’t have a cast iron skillet?
You can use any oven-safe skillet or a 9×13 baking dish, but you won’t get quite the same caramelization on the edges.
Why use a mix of apples?
Different varieties give you the perfect balance of texture and flavor. All tart or all sweet just isn’t as interesting.
My topping isn’t getting crispy enough—what happened?
Make sure your butter was cold and don’t pack the topping down too firmly. Also, don’t cover it while baking or storing initially.
Related Recipes:
- Apple Crisp with Vanilla Ice Cream & Caramel Drizzle
- Vegan Apple Crisp – Classic Flavor Without Dairy
- Apple Cranberry Crisp – Sweet & Tart Fall Dessert
- Apple Crisp Bars – Crunchy Crust & Crumbly Topping
- Apple Crisp with Granola Topping – Extra Crunch Recipe
Final Thoughts
There’s something deeply satisfying about pulling a bubbling skillet apple crisp out of the oven, especially when it’s made with love in your own kitchen. This has become one of those recipes I turn to again and again—not just because it’s easy and delicious, but because it brings people together around the table.
I hope you give this skillet version a try. The cast iron really does make it special. When you do make it, I’d love to hear how it turned out for you—did you add nuts? Try the bourbon version? Drop a comment below or tag me on social with your creation.